Plug-ins
From the version 1.9.2 on Aston has got a new plug-in configuration system
which is generally described in Aston Shell manual. Here we won't
repeat everything written there and will just focus on some less obvious
aspects of skinning certain plug-ins.
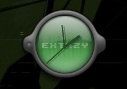
Aclock
Aclock is an analog clock plug-in for Aston featuring anti-aliased
hands, glass and other interesting things. In fact it gives you anything
you can wish from a modern analog clock widget but takes considerably less
resources.
Clock skin itself consists of three parts (as defined in the
Skin tab):
-
Glass skin - optional
semi-transparent top layer, often displaying glass reflection
-
Background skin - the clock itself, the
main skin image
-
Hands texture - hand texture
image
The first two layers are pretty common and I'm sure we don't
need to explain what "glass" means.
Hands texture is used the following way: you define each hand's
width and radius and then instead of being filled by a solid color the
hands are "cut" from the background. Below is a sample from
Dmitry Prosvirnin's "Aston 1.9.2 Desktop" Theme:


Background (left) and hand texture (right) skins for
Aclock plug-in

The resulting image
I think the pictures talk for themselves. Still, this technique is not
common and many users prefer some more common look of the clock:
Aclock by frozzen from his "N-SyS ^ e X T a Z y
^" Theme

Fragment of Roman Osadchy's "Techno
Dream" Theme
While frozzen has decorated his skin with a glass, Roman has made a
transparent background, so the clock looks pretty at any part of the
screen.
Configuring other plug-in's options should be relatively easy as
most options are hidden in the Skin tab. You
should generally configure hands properties plus carefully define the
hands center offset (by default it's located exactly in the center
of the background skin bitmap), set hands color (you can also make hands
drop shadows!) and finally define date options. Even though date is rarely
displayed on the analog clock (in most cases designers don't think
it's necessary) you can make an exception.
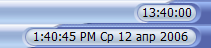
Taskbar ClockEx
This plug-in displays Tray clock and can also show calendar on clicking
or pointing to the clock area. Tray clock can be skinned by applying a
single image plus making some font tunings. In the most primitive case the
clock background might have the same texture as Tray, but it's far not the
most beautiful solution.
By using some more complex images you can get much more interesting
results:

Taskbar clock from the "Ocean Morning"
Theme by Roman Osadchy
And with 3PICs your fantasy is unlimited. Just note, that this is
actually the same skin with different user-defined time display modes.
Fragment of Smanic's "Corona" Theme
mockup
In order to make something similar you'll just have to define a
proper 3PIC as a background in Skin>Clock>Background skin plus to fine-tune the text
offsets.
There're just two of them: Text offset
left and Text offset right. The first
value defines the offset from the left border of the skin while the second one
points out the right one. Configuring the text in Fonts and
Colors tab is even easier: nothing complex at all.
Now let's turn to the calendar.
It can be displayed in one of the following modes (Misc.>Background type):
Still, it would be great if you could make a decent skin for it although in
certain cases you may get appropriate results with the colored
background.
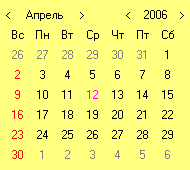
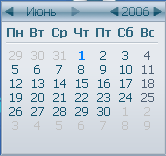
TaskbarClockEx calendar, solid infill
mode
Colored calendar might look quite primitive and should mostly be used in
minimal Themes. Taking into account that calendar skinning is not complex
and its skins might be nearly as attractive as the ones of Rainlendar you're free to
experiment:
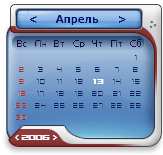
Frozzen's calendar prototype for Aston 1.9.2
You can change all the font properties and colors (like
setting different fonts for today, months, year and previous/next months)
and place date/month/year text in any part of the skin. You may also have an
additional glass layer to be dislayed on top of the calendar.
Note, that you may replace text month/year arrows with custom images, even ANKz.
By default the arrows are located outside the month/year rect.
At the same time you may place the arrows to any part of the skin by setting the values of the corresponding arrows' bound boxes. Also take note that these bound boxes are made only for arrow positioning and thus the arrows are displayed inside the rect.
In fact there're lots of things you can do: just use your imagination.
Calendar from Aston 1.9.2 "Makrom" Theme by DanilloOc
You may highlight the current date by changing its font and color properties but you can also assign a background or glass to it on Skin tab.
MenuEX
The process of the Main menu skinning is already described in the
corresponding
section.
Note, that the Main Menu and Start button are skinned separately.
Quick launch
There's not much you can do with the Quick launch plug-in. Mostly
because it uses the same skin as the Main menu and you can only define
additional skins for the background (in most cases the skin is the same as
for the Taskbar) and the menu access button (which makes QL behave like a Start
button).
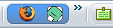
Here are just three common skins for the Quick launch button:

Quick launch buttons from the "Ocean
Morning", "Duality" and "Prion" Themes by Roman
Osadchy, SacRat and mrbiotech correspondingly.
With the implementation of 3PIC support and left-right offsets for the Quick Launch background in Aston 1.9.2 it has even become possible to mimic Windows Quick Launch:
Taskbar fragment with Windows-like Quick Launch from the "Makrom"
Theme by DanilloOc.
You can easily find out the way of creating similar skins by just having a look at this Theme, included into Aston 1.9.2 package ;)
DisksEx and RecycleBinEx plug-ins
These plug-ins are very similar: both are skinned by a single frame list
and both require nearly no efforts to fine-tune.
These plug-ins are multistate i.e. they can visually indicate the state
of infill for the HDD partition and the Recycle bin. The actual number of
frames (states) depends only on your wish. In any case, make at least
three, for the full, intermediate and empty states.
Note, that the first frame of the Disks refers to the
full partition while for the Bin the first frame is used for the empty
state!
If you're reading this you must already know how to make a frame
list with the set of frames (this topic is covered in the ANK
section). Here're just two image list fragments from Dmitry
Prosvirnin's "Aston 1.9.1 Desktop" Theme:

First three frames from Dmitry Prosvirnin's
Disks skin

Last six frames from Dmitry Prosvirnin's Recycle
Bin skin
Should we mention that you can draw nearly anything you like instead?
One more thing about the Disks plug-in you should know. For Disk labels
you might use the following predefined commands:
-
\r\n - return (new line)
-
%name% - disk label (name)
-
%index% - disk letter
-
%free% - free space
-
%freeEx% - free space without Gb/Mb text
-
%total% - total disk capacity
-
%used% - used disk space (in gigabytes/megabytes)
-
%p_free% - percents of free space
-
%p_used% - percents of used space
Everything else should be intuitive.
Panel
From the moment of its appearance in Aston 1.8 on TopPanel has become one
of the most popular Aston plug-ins. Its current successor, Panel, gives you
everything you need to organize shortcuts on your Desktop. Skinning Panel
is harder than most other plug-ins but it's worth the efforts.

Panel from Dmitry Prosvirnin's "Aston 1.9.1
Desktop" Theme: classic Panel skin
Panel lets one organize shortcuts into two-level menus. Although one can
create a single "stripe" of shortcuts (using only one level)
we'd recommend not doing this. The first level items are called
Categories and the second level items are just "Elements".
Skins are defined in the Skin>Skin list
section. There're actually not many of them:
Each of these elements has 3 state skins.
While creating a default panel item tree, don't
assign links to the first level elements as this might be confusing
for users.
Have a look at the screenshot below:
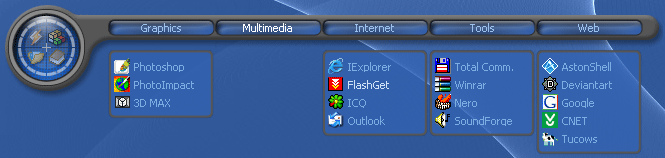
Panel from SacRat's "Duality"
Theme
It's quite a typical look of Panel except for the left flank being combined with the set of ANKs.
- Here're a few hints you may find useful when making Panel skin:
- Use flanks to give your skin a solid look.
- Don't ignore the ability to use different bitmaps/fonts for the normal/highlighted and the pressed states of each element: it can boost the ease of its use. Still, extremes should be avoided as usual ;)
- Use offsets in bound boxes to position the text precisely.
- Playing with Category offsets might be useful when making "overlapping" elements or when it is necessary to shift them a bit.
- Icons are easy to position using horizontal offsets (setting vertical ones is possible only by adjusting bitmaps).
- When using shadows for elements be twice as careful since overlapped transparent elements look poor. In order to apply overlapping shadows you'll have to render them on bitmaps though it's not an advanced technique.
- Just have a look at the variety of panels created by Aston Theme designers if you're stuck and ran out of ideas.
AMonitor
AMonitor is a basic resource meter plug-in for Aston. It can display the
following information:
-
CPU usage
-
Memory load
-
Network load (in/out)
Any of these data can be represented as a text, as an image (a frame list) or
both. Graphical meters are frame lists, representing the required value as
a set of intermediate images.
Note, that the first frame in the frame list, used by
AMonitor, always represents the smallest indicator's value.
Skinning the plug-in is relatively simple: you have a background skin
plus a set of meters you can use (leave the fields empty if you don't
need a certain meter). Just place all the meters you need to the background
and make sure they're positioned correctly.
Note, that it's easier to place meters if you start with using
stubs with a single frame, keep on with correct placing all the elements and
only then perform replacing stubs with the correct frame lists (don't forget
to correct the number of frames!). This will save you a lot of
time.
And, finally, a few sample skins after known Aston designers:

AMonitor skin by Roman Osadchy ("Techno
Dream" Theme): CPU and memory meters.

AMonitor skin by frozzen

AMonitor from SacRat's "Duality"
(Memory and bandwidth meters)
All these skins use frame lists for meters and the last two sometimes
duplicate the info with the help of the text.
Search
Search is a brand new plug-in from Aston 1.9.2 package.
It's only goal is to send a search query to a web browser i.e it's just a basic search module. It's most interesting feature is that the plug-in's window increases while you type the text in it so the quiery is human readable.

Search plug-in from the "Makrom" Theme by DanilloOc.
In order to make a skin you'll have to make just two graphical elements: the base skin the and search button.
The base skin is basicly a 3PIC where the central tiled part is used for the search query text.
In order for the plug-in to be displayed correctly you'll also have to set two additional values on the Misc. tab:
- Min search area size: the minimal skin's width.
- Max search area size: the maximal skin's width.
Select the same values so setting the minimal width to 50 and the maximum to 100 is not cute. Just make sure that with the minimal width the plug-in looks ok (and even better, it can contain at least 10 characters) and with the maximal width it remains on the screen while containing about 30-40 symbols.
The search button is positioned relative to the left-top pixel of the right 3PIC flank, so you'll most likely
have to set the horizontal and the vertical offsets in order to position it.
The search field also needs to be positioned. By default it has a white (not transparent!) background and 17 px height. You cannot change the background color but you can tweak the query font, so it looks more or less the way you'd like to have it.
Other plug-ins
There're some Aston plug-ins not mentioned here. They're mostly created by third-party developers but
if you have read this chapter it should not be hard for you to make skins for them as well.